|
|
Back in December 1998, we brought you an insight into the home-workshop of Yorkshire Rep, Paul Blackbourn, and a sneak preview of a fabulous show winner in the making. A year or so later, we decided it was high time for a progress report to follow up what has been one of the most talked-about articles we ever printed...
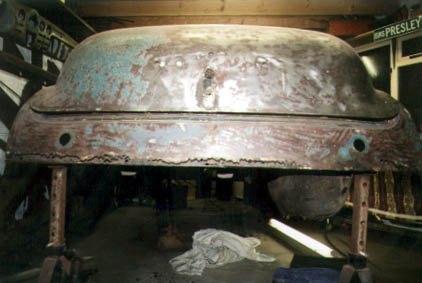
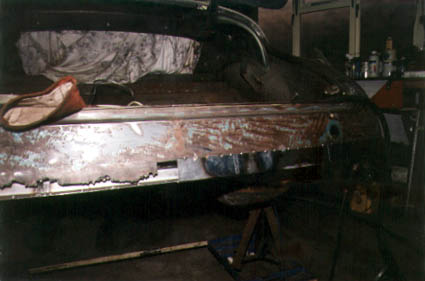
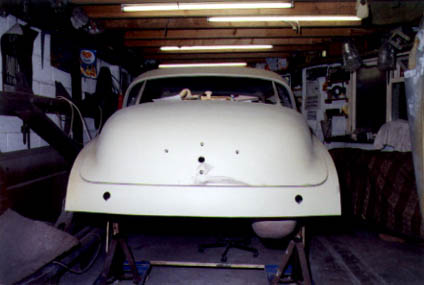
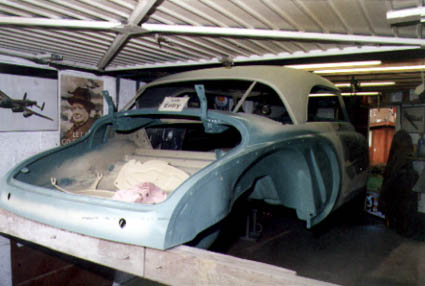
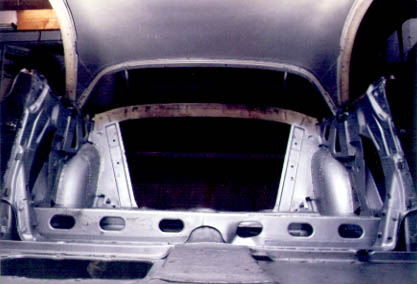
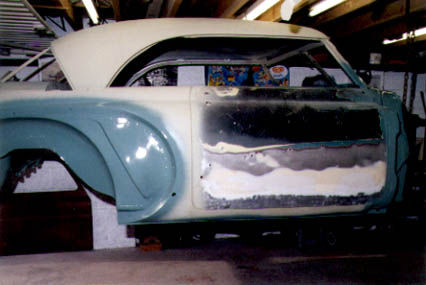
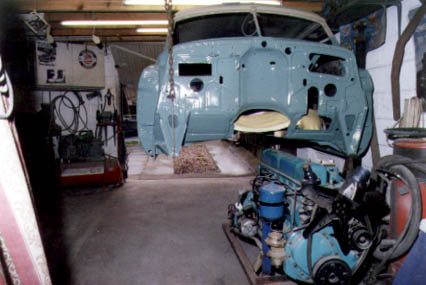
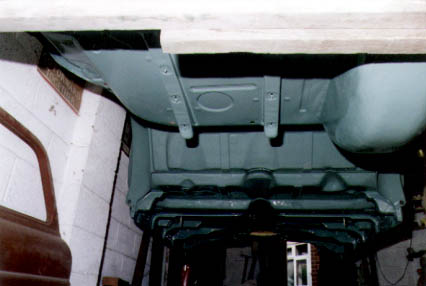
When we left Paul's coupe in December 1998, it was at last regaining its dignity, showing a resemblance to the automobile of distinction it had once been. Beautifully styled curves were developing from the mass of decaying panels, as Paul re-crafted new metal into shape and repaired the existing bodywork to its as-new state. In the past year, Paul has been faced with a great deal more challenges. However, the main body of the car is now repaired, including the severely corroded rear skirt, the bottom few inches of which was gone altogether. Certain parts are now even in colour, such as the whole underside of the floor and bulkhead, inside the trunk lid and inside the rear fenders. The body alone has taken approximately one year to reach this stage.
While this was being done, Paul found plenty of tasks to occupy his lunchtimes. Every day, little by little, such items as the front wishbone assembly were prepared for fitting straight to the frame, which, at this moment is being sand blasted and painted, and is due to return home very soon. When scraping off half a century's grime the elusive VIN number appeared which will be deciphered for any further clues to the Buick's exact origin.
The dash and all metal for inside of the car is in its finish colour of Cirrus Green. The wiring loom is the original, now repaired by Paul and rebound at a specialist. Fortunately it was totally untouched, managing to avoid the usual molestation by DIY electricians through the years. Many of the colours had faded, but once the binding was removed, and wires turned, all was deemed good and repairable. Paul also rebuilt the speedo himself while the temperature gauge had to be sent to a specialist, as was the clock. All in all, the whole dash is assembled and ready to be slotted in. The radio will be fitted later for weight reasons - all the chrome dash bits are re-plated and Paul just hopes now that all the wires are in the right places!
The hydroelectric system was next; the pump wasn't a difficult job, requiring just a good clean up and new brushes. All the switches were all fuzzy inside (bad contacts). Then the hydraulic cylinders (what a job!). There are five on the Riviera: four windows and one seat cylinder. "I am not even going to try to tell you how they were done..." recounts Paul, " ...as it is too difficult to explain on paper. I have finished them and the whole system is a working rig so I can periodically run the cylinders up and down to keep everything in running order". Paul cannot stress enough, that such a job should not be attempted by anyone other than a "seriously experienced engineer". £100 was "gambled" on the creation of the rig (including the battery to run the system) from which Paul could ascertain just how the system worked, before attempting to rebuild the five units which, incidentally, would have cost £600 to replace. Another unforeseen headache transpired from the rebuilding of the wiper system. Here, countless hours were spent routing cables around pulleys, ensuring precise lengths were maintained to prevent the wipers wandering up and over the roof during operation!
Currently, Paul is sorting out the rear axle internals, which he expected to encounter no problems with. But, sure enough, found the wrong half shaft (and evidence that the original had been broken), a loose crown gear and the planet gear worn to excess. It is often the 'little things' which can cause the greatest problems. Locating the 3/4" x 5 1/2"-diameter pin (worn to 0.010) which goes through the middle of the planet gear, posed a mighty problem. A stateside breakers offered to pull one from a used diff., but this would render the diff useless, and cost $95, with no guarantee that the pin would not be as worn as that which Paul wished to replace. Concluding that this was not a good option, Paul sent the pin to a metallurgist so that the properties of its make-up could be analysed. The pin was sectioned, tested for hardness and a replacement manufactured and casehardened as per the original. |
|
|
|
|
|